Saturday, June 29, 2013

Firework Headband and 4th of July Visor Craft

 Emma is a girl who loves to accessorize! I should probably not support this habit (that everyone curses us with...you are gonna be in trouble with that one!) But, it's just so darn cute to watch her each morning rummage through her baskets of bracelets and "match" them up to her little outfit. So, for the 4th of July we had to, of course, make a few accessories.
 This cool Firework Headband was easy to put together. We twisted a bundle of three pipe cleaners to each side of the band. The sparkly one was a fun addition!
 At the top, we used a pencil to curl each pipe cleaner.
 That's it! Emma loves this fun festive headband.

 Our Fourth of July Visor Craft is a great party craft for kids. It comes together really easily with a few foam or felt stickers and glitter glue. A lot of fun for all ages to make.

Friday, June 28, 2013

Burlap Flags for The 4th of July

 OK, I am a little bit in love with these flags. They came out so beautiful and rustic looking. A great DIY 4th of July home decor. They were pretty simple to make, too. Plus, we loved making them, together!
 We had a large sheet of burlap. You can get burlap at any fabric store and it's very inexpensive.
 We cut flag shapes in a few different sizes. Emma loved helping with this, but Grayson is still a bit rough around the edges with scissor control.
 We painted right onto the burlap using acrylic paints. Since burlap has small holes in it be sure to have paper on your working space.
 For our smaller flags we used popsicle sticks and for the larger ones, wood dowels worked perfect. A little hot glue connected the two and that was it.
 What do you think? I am a big fan of farmhouse style so these flags are beauties to me. I am even hoping to make a large pennant banner using the same theme.
If you don't have burlap and want to do a simple craft with the kids you can also just use paper for the flags. Enjoy!
For more details, I shared this craft tutorial over at Kiwi Crate.

Thursday, June 27, 2013

Maple Syrup Sweetened Whip Cream

 We were busy bees in the yard today as we attempted to clean the deck. Eventually I just pulled out the kiddie pool and let the kids cool off. I heard Emma mention to the little guy how wonderful it would be to have an ice cream treat. Feeling in a summer kind of mood and very impressed with the help I got from the kids today I decided to surprise them with a little treat. Ice cream is not something we have in the house, but I did have some cream (way better in my opinion!)
I whipped up about 3/4 cup heavy cream, 1/2 tsp of vanilla and 1 tbs of real maple syrup. Whip on high-speed in an electric mixture until you get a soft peak. We topped our yummy whip cream onto bowls of fruit. A few chocolate chips on top got screams of joy from the kids. Gotta love that!

Tuesday, June 25, 2013

Patriotic Rocks

 OK, summer is already moving way too fast for me and it's not even July yet! Since moving to a place where summer is so celebrated (rain, rain go away....) I just want to dive in and embrace every little wonderful thing that makes up summer. Watermelon slices (Yes, I always cubed it in the past, big difference,) barbeques, road trips, beach weekends and lemonade stands! I want to do it all and I want it to go as slow as possible. Too much to ask?
 Independence Day is just around the corner and we are getting ready for it. We made these fun Patriotic Rocks and I have to say it was one of those crafts that I really got into as well. Love when that happens! We painted our rocks using red, white and blue acrylic paints. The colors really stood out nicely.
I think we will scatter these on our tables outside during our July 4th barbeque.
Happy Summer!!

Sunday, June 23, 2013

Creating Wall Art with Children

 There are many paintings around my home that my children and I have created together. They are so special to me and I am sure one day they will be very special to my children, as well. I get asked about these so often. How to get your children involved in such a painting? How to keep it from turning into one big brown canvas?? I decided to right a post with tips to create your own masterpiece as a family. It's actually a great hobby to do together.
 OIL PASTEL, CANVAS & IDEA
I usually have my kids start with a large canvas and a black oil pastel. We sit and talk about what we want to paint and then talk some more about the different details that should be in our painting. At this age it is much easier for them to draw on the canvas and fill in with paint. Starting with paint is better for a very abstract painting.
TAKING TURNS ADDING TO THE ART
Having the kids take turns adding details has become a wonderful tool I use. Not only is it keeping our initial drawing from becoming too over crowded and out of control, but it is teaching my kids to work together and to be patient. At first, there was a lot of bickering, but eventually they enjoyed taking a moment to appreciate what the other was drawing. It was nice, really nice.
PAINT
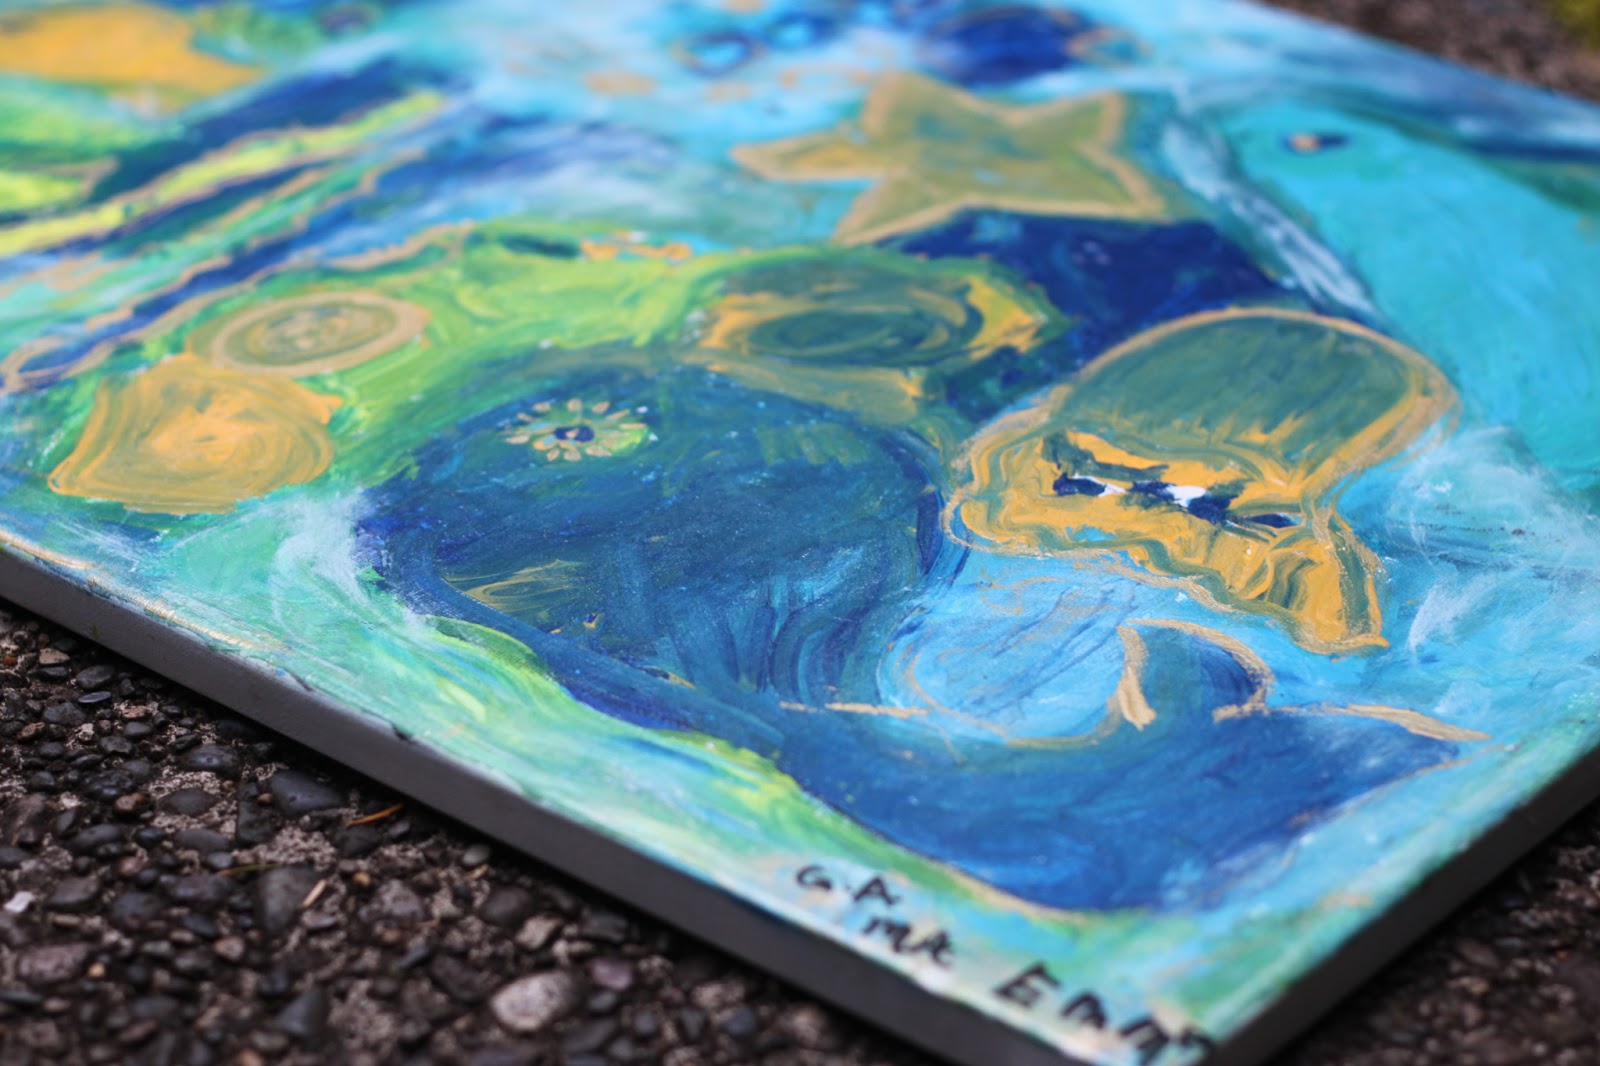
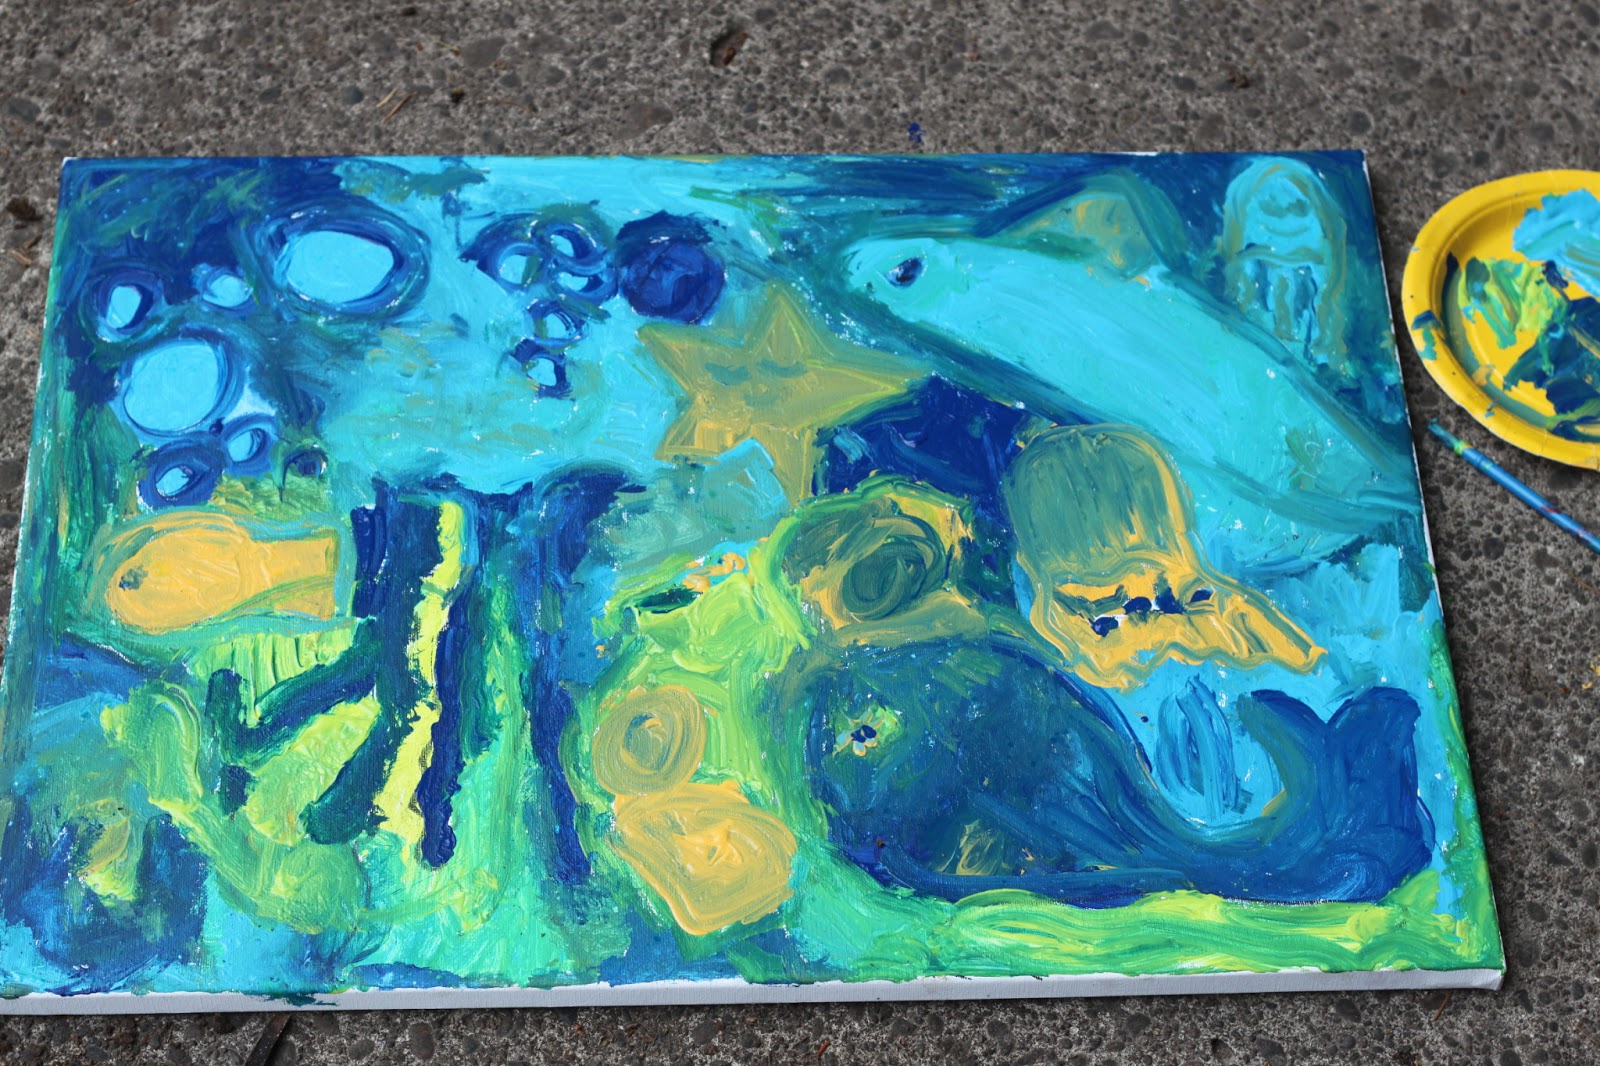
Once we were satisfied with the drawing we moved on to paint. We used acrylic paints and kept it very simple using just four colors. Before I unleashed the paints I asked the kids to try their best to keep one brush to one color and to try not to mix colors too much. I also showed them how to blend instead of mix (this is very helpful at keeping a painting from turning into the infamous "brown" painting.)
 At this point we all painted together. The taking turns for the drawing stage was great, but all that is thrown out the window once the paint comes out!
 
 Here is what we ended with. Pretty good, right?
FINAL TOUCES
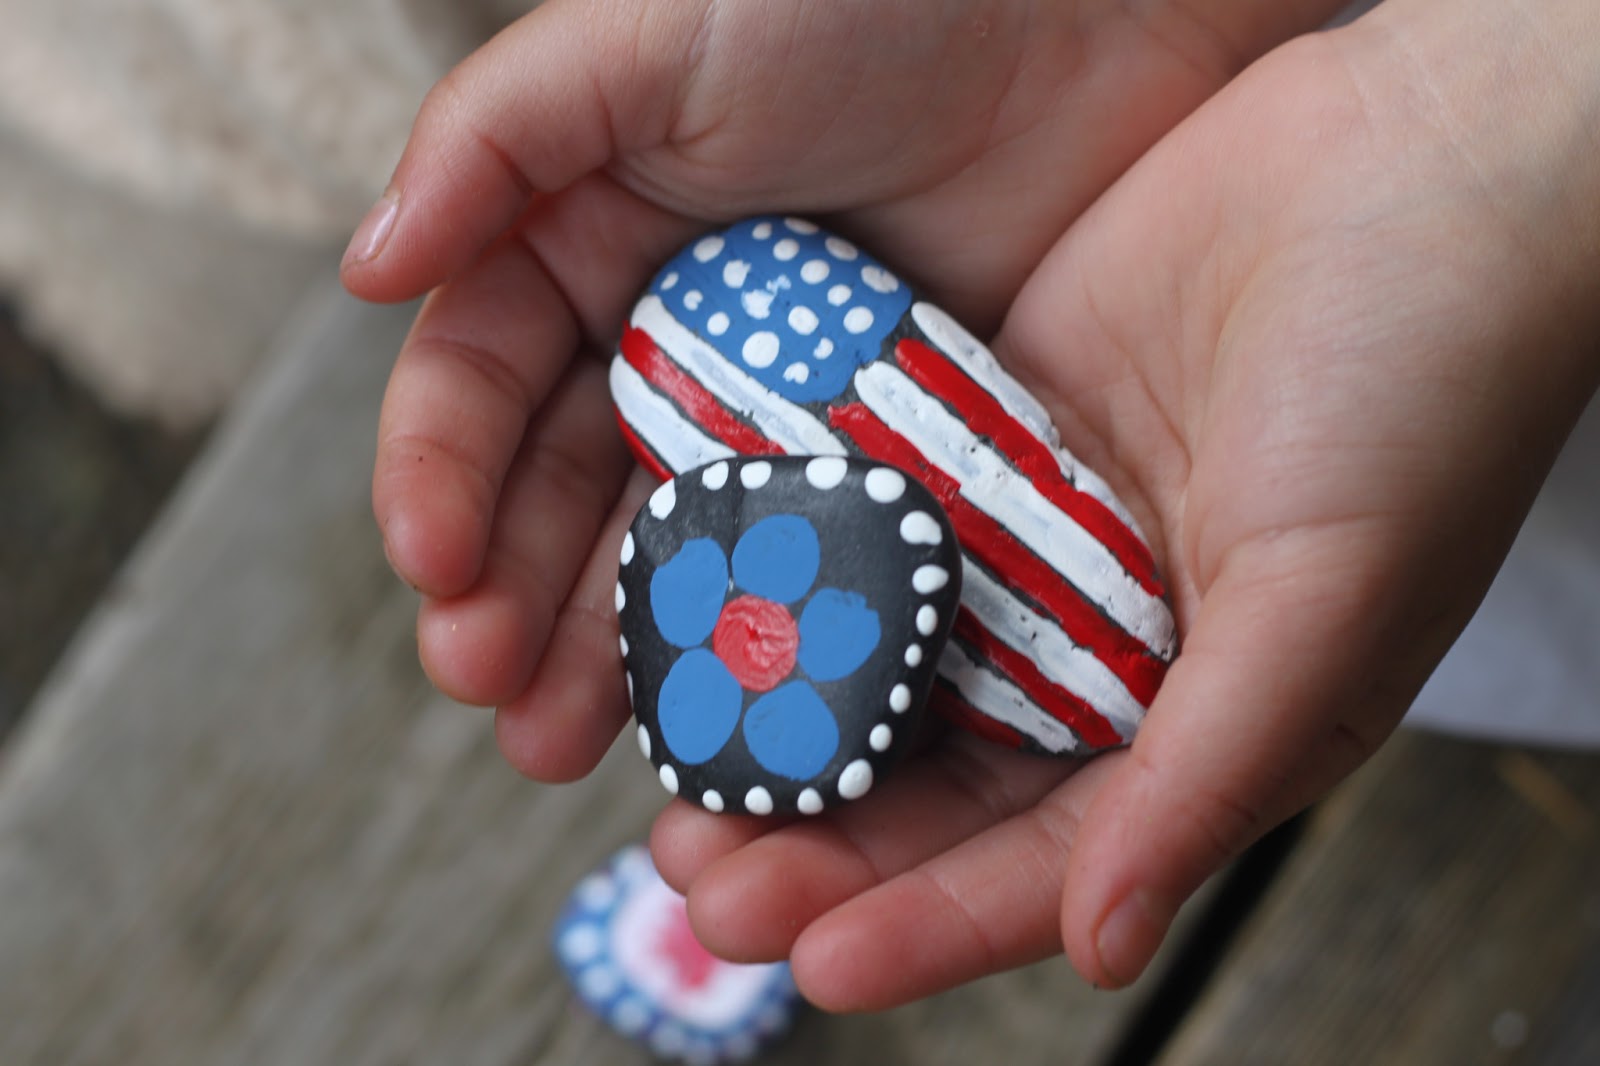
Once the painting was dry I used a foam brush and added a little bit of white washed details to soften it up a bit. You do this by dotting white paint in the areas you wish and using a rag to almost rub it in. This creates a softer look. I also used some gold paint to outline some of the kids drawings that I really wanted to stand out.
 We all signed out masterpiece and I gave our art two coats of clear varnish.
That was it. A beautiful painting made by my babies (and me.) Is it too presumptuous to imagine this hanging in my future grandchild's nursery???

Friday, June 21, 2013

Confetti Votive

 I just can't seem to get rid of jars. They have so many fun possibilities. We made these Festive Confetti Jars for the 4th of July. They were really easy and look so festive and fun when we set them outside with candles lit in each one.
 It's always fun for me to start projects like this without inviting the kids over. Once they get a peek at the cool materials I have out they just can't stay away. It's sort of my way of leaving that open invitation out for them to join me in creating, only if they want to. On this day they sure did! Who could resist that interesting mix above.
 Emma joined me and helped to mix some mod podge and confetti together. She had no idea what I was planning, but she's a girl who loves to mix things up, so she was fine with this job.
 I rummaged through our jar collection and pulled out a few. I think our backyard dining table will look great with a few of these in different sizes.
 Look how cool it already looked? You can cover them as much as you'd like. We went up a little more than half way on this jar. Using stencils to make shapes on the jars would be fun, too.
Now that is a good use for a pickle jar!

Wednesday, June 19, 2013

Shaving Cream Bakery

 I keep shaving cream on hand all the time. When my kids are restless and need some fun added to their day, I pull it out and let them explore. It's so wonderful how a simple can of shaving cream can make children so sincerely happy and content. On this day we discovered the joy of a backyard bakery.........
 This is really easy to set up with whatever you have on hand. What I used was a new pack of kitchen sponges (to be our cake layers,) a squeeze bottle, salt shaker (salt and food color makes great sprinkles,) plastic spatula, spoons and dishes for mixing colors and of course the shaving cream!
 They didn't need much instruction. They just went for it, which is exactly what I had hoped for. Kids often learn, discover, and play through touch. I am a huge fan of sensory play--especially when we have had a big week and just need to come back to a calm place.


 I know this mess can be a little discouraging, but that is why we are outside. Afterwards, I filled buckets with water to wash all of our tools (and kids) and brought out the hose for the rest. I involved the kids in the clean-up process as well. I think it teaches them responsibility and gives them confidence to help.
Bliss.

I shared our Shaving Cream Bakery at Kiwi Crate. Head on over for more details.

Tuesday, June 18, 2013

Coloring Book T-Shirt

 I surprised Emma with this coloring book t-shirt awhile back. It was a big hit and gave me a chance to get crafty, too!
 At first I thought I would use a coloring page to place inside the shirt and trace my drawing, but I decided to free hand a drawing for her. Either way works. I used black puffy paint for my outline.
 Be sure to have a sheet pf paper or cardboard on the inside of the t-shirt so the paint doesn't go through to the back. Once my drawing was complete I let it dry over night.
 The next day I gave my creation to Emma along with some fabric markers. I think sharpies may work for this as well, although I have yet to test it and not sure how they survive the washing machine.
 This was a fun activity for Emma. She loved the idea of coloring right on a t-shirt. I think this would make a pretty great birthday gift for friends.
She proudly sports this t-shirt often and is sure to let everyone know she made that work of art!

I shared the Coloring Book T-Shirt over at Kiwi Crate. Head on over for more details.

Friday, June 14, 2013

Rubber Band Splatter Painting

 Summer vacation is officially here and that means it's time to dig up all those backyard messy fun activities. DIY Splatter Art is one we did last summer and my kids have not stopped talking about it since.
 All you need is an old frame (glass and inserts removed,) large rubber bands, paint, paint brushes and card stock.
 This long frame worked great for the two kids to each have their own space because there was no way that "taking turns" was going to go over well with something this exciting!
 Once the rubber bands are wrapped around the frame I place the card stock in between them and got our paint ready. I told the kids to only paint the rubber bands. They were a little skeptical, but not for long......
 The delight on their faces when I made the first splatter was wonderful! They were simply happy. Doesn't take much and I love that!
 This is a pretty messy activity. I definitely suggest using washable paint as my kids got a little splattered themselves! Emma loved her new added colors.
 Look how cool the cards were looking. Did I say we were making fun birthday cards? We love homemade cards.
I'll be breaking out this old frame turned splatter paint station this week. Happy Summer!!