Friday, March 30, 2012

Ballerina Clothespin Bunny for Easter


Last year, the night before Easter as we were preparing to leave carrots and a letter out for the Easter bunny, Emma broke out into tears. Why? Well, would you like a larger than human sized rabbit coming into your home while you're sleeping even if he was packing chocolate and jelly beans? Emma was having no part of this; except of course she would like the treats without the intrusive bunny. She was smart and asked us to call the Easter bunny and inform him that she would prefer her goodies left at the neighbors house, which we of course did in order to get some sleep that evening.
As we prepare for this years bunny arrival I wonder what the outcome will be. Maybe this ballerina bunny craft will warm her up to the idea.

Material needed:
round top clothespins
white paint
paint brush
white felt sheet
small white pom-poms
googly eyes
fancy trim for tu-tu
tacky glue
sharpie

1. Paint your clothespins white and let dry.

2. Cut two ears from felt and add them to the head with tacky glue along with googly eyes, trimming tu-tu and pom poms for feet and tail.

3. Add the mouth with a sharpie and you are all set for some imaginative ballet bunny play. What could be better?

Wednesday, March 28, 2012

Berry Basket Craft, Friendship Box


Head over to Family Sponge today and see the special friendship box we made using a strawberry container. This would make a great little Easter treat box too.


Happy 5th birthday Odessa! We love you!


Saturday, March 24, 2012

Coffee cup Easter basket craft

If you haven't noticed, I love to use recyclables for art. It just makes me happy. Especially when they turn out this cute. Today we fished out way too many disposable coffee cups and sleeves (too hot to handle things) from the recycling bin and turned them into cute little mini Easter baskets.

We painted our sleeves using dot paints, but I think any kind of paints or markers would work great. You could even get a little crazy with it and glue on some jewels and sequins. Next, I cut the coffee cup the same height as the sleeve and attached it to the inside of the sleeve with tacky glue.

For a handle, just use a hole punch to add a hole on each side and add two pipe cleaners that you have twisted together. This is good for the little ones.

Add some paper grass and treats and you got a little Easter basket. This is one that would be good for a neighbor, teacher or any gardener in your life. Carrot seeds (for Easter, get it?) a garden pick and chocolate bunny.
With some cellophane they wrap up very nicely. We may make some more for Emma's classmates. They were really easy and fun to make, plus I love when I can show the kids that pretty much anything can be given a second life when you get a little creative.

Thursday, March 22, 2012

Super Snow review


I have been meaning to try Super Snow by DuneCraft for awhile now and finally did the other day.
Wow! We have been missing out! Super Snow is a wonderful product that allows children to explore, pretend and have quite the sensory experience.

  All you do is add a tablespoon of Super Snow to 32oz. of water and stir. It instantly becomes thicker and thicker and has a really neat sparkle to it, like real snow. Emma had has much fun making it as she did playing with it.

 After pretending it was real snow with her polar bear figurines in tow she grabbed some kitchen tools and it became her batter as she was transformed to a chef.

We eventually added some liquid watercolors and did some color mixing. Her final color was purple and she was more than thrilled when I suggested she take a little to school for show and tell that day.

I love products that get kids using their imaginations and asking lots of questions. Super Snow seemed to have endless possibilities for Emma and it was so simple to make, plus non toxic. We will definitely be doing this again very soon. What a fun way to fill several afternoons (day four and it's still out and getting used.) If you are afraid of a little mess this may be an outside adventure for you. I just laid a big tablecloth down to catch the fallen snow.
Check out DuneCraft to get your own Super Snow!

Wednesday, March 21, 2012

Photo Box Craft- Keeping kids connected


Check out a great way to keep kids connected to family when living far away. I am over at Family Sponge today making these fun photo boxes.


I captured this very real moment as Emma looked at a picture of herself with her Aunt Jess. Reminded me, that even though children are so little, they still have very big emotions and feelings. Today was a great day to talk about all of those feelings with her. 

Saturday, March 17, 2012

Sewing for kids


I find that when I am being creative around my children they seem to want to be creative as well. We inspire each other and this is the artful harmony I dream of.
Emma has been watching me work on an Easter project all week. This project includes a needle and thread, which she is dying to get her little hands on.


I finally made it to the art store to figure out a way to make this happen for her; in a less dangerous way. I found these great plastic sewing needles perfect for the little beginner. Now what to sew? I had some felt and yarn. I cut two pieces of felt into a coin purse shape and cut slits all around the edges. I threaded her cute little needle with yarn and demonstrated the first couple of stitches for her. I was amazed at how quickly she got the hang of it.


We left both ends long and tied them in a bow to finish off her cute little purse. She was very proud of her very first sewing project. Another moment for the book.

Wednesday, March 14, 2012

St. Patricks Day Charm Necklace


Holidays are always a reason to celebrate in our home. I love decorating the house and having many traditions to make it special for our family. 
Join us out over at Family Sponge today and see how a milk jug from your recycling bin can become a fun and festive craft for St. Patrick's Day. 

Happy St. Patricks Day to you all!
xo
green owl mama

Sunday, March 11, 2012

Flash Cards

    
I really can not even comprehend that we are months away from starting kindergarten. Where has the time gone? I remember Emma's first steps like it was yesterday. That feels so cliche to say, reminds me of every older woman that I run into at the grocery store that tells me to cherish each moment because time goes way too fast. Well, I am starting to feel that fast clock move and it is scary. If only someone would have figured out that freezing time thing by now.

In preparation for kindergarten we made some fun flash cards to practice math with. I found this cute box of note cards and wrote numbers on them with a black sharpie. Emma found and counted out all the trinkets (coins, buttons, stickers, googly eyes) and we glued them on our note cards. This is a great visual learning tool and best of all Emma enjoys playing with them. 

Now I am off to cherish these moments, they go by fast, you know?
Happy Sunday!
xo
green owl mama

Thursday, March 8, 2012

St Patrick's Day hair clip


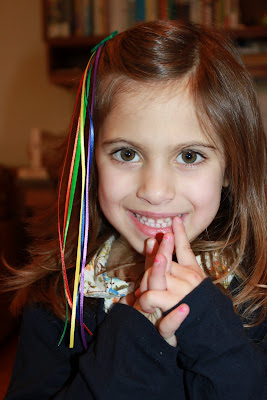
I think Emma may give her left arm to get her hands on one of those hot pink hair strand clips. If she spots them in a store I am in for it! I definitely see the appeal for my four year old, but I can not give in. They smell like toxic plastic and look a little too teeny bopper for my little girl just yet.
When I was thinking of a way to make her a St. Patrick's Day hair clip I knew I must add some pretty "hair" attached, but in a softer looking way.


I cut a rainbow assortment of ribbons the length of her hair and used hot glue to attach them to a plain snap clip. For a finishing touch I cut a shamrock from felt and added it on top.


Can you just feel the excitement this brought? It was great.

Tuesday, March 6, 2012

Tapioca Balls


While in our local Asian market recently I came across a bag of tapioca balls used for boba tea. I remembered seeing this on pinterest awhile back and have been meaning to pick some up. Perfect timing as my two little ones are in need of some good sensory play.

We followed the cooking instructions on the back. I think it was to boil until plump and then let set covered for a few minutes, but I am guessing each bag is somewhat different. While they were cooking; the kids raided the cooking utensils for some fun tools to use.

These were a big hit for us. They are very similar to the magic water beads I posted back in January, but the consistency is more gummy and sticky. Alone in a bowl they are way too sticky to work with, but if you add a little water they feel just like a gummy bear. Emma enjoyed scooping, mixing and measuring and Grayson enjoyed squishing and eating. They were a good team.

Saturday, March 3, 2012

Girl Scout Envy- Homemade Badges


It's that time of year again, when walking into the grocery store you are greeted by girls covered in badges, big smiles on and pleading to sell just one more box of samoas. For me this has turned into Girl Scout envy in our house. Emma has a whole six months left until she turns five and can become a Girl Scout herself, but she is not too thrilled to wait especially when her big cousin is already wearing the vest full of badges that she so badly wants.
I decided to make Emma a "in practice" Girl Scout vest to make the wait a little more tolerable. I surprised her with the vest I made out of a t-shirt and we started creating badges to earn. So far, she has received a badge for friendship, baking, ballet, new school and nature. This was fun to do and an excellent way to teach new skills and give Emma a sense of pride for her accomplishments. She wears this vest proudly, to say the least.

Materials:
t-shirt
scissors
scrapbook paper
stickers
mini doilies
double sided tape
masking tape
safety pins

If your t-shirt has print on it you can use the back as the front of the vest like I did. First I cut off about an inch off the bottom of the t-shirt. Then I made a cut right down the center of the shirt. You can cut the sleeves off if you choose, I decided to just leave them be. There you have the vest.
Now for badges. I found these cute little doilies in the Martha Stewart scrap booking line. I cut rounds out of the paper and layered them on the doilies using the double sided tape. Next embellish with stickers to represent the meaning of each badge. I chose things we were working on at the time....new school, nature walks....ect. When your badges are complete use the masking tape to attach safety pins to the back and you are all set to pin your little Girl Scout.


My little Girl Scout in the making.